


If you are a professional photographer who has done any kind of studio work, chances are you’ve worked with in some form. If you are an amateur or hobbyist and you’re just starting to explore studio work – you will no doubt encounter clients who will need or request shots on white as well. is a “bread & butter” product that you’ll find in every studio photographer’s arsenal of equipment.
So Why White?
Over the years it has become a standard for product photography and other forms of catalog work. White provides a bright, neutral color reference that does not compete or interfere with the subject and other colors or patterns that may be involved. It can also be easily altered to create composite images for print ads and online graphics. It’s extremely flexible because you can change the shade and color easily with different lighting setups and in post-editing to affect the finished end-result based on the intended use.
In this article we’ll be discussing the differences between each of the Savage white seamless paper colors along with different light setups and side by side examples of each. This should help you decide how to pick the right white seamless paper for the job and how to setup your lights for different effects.
Challenges
Setting up a high key shot with white seamless paper can be overwhelming when you read about traditional lighting setups which often discuss as many as 4-5 light sources. Lets face it, a lot of us don’t have that many lights, especially if we are traveling and don’t want to pack excessive amounts of equipment or simply don’t have the space. I’ve had to shoot with just 1 light while traveling with limited equipment and set up in a small area. As an alternative to seamless paper, I highly recommend the Savage – they can really save time and space.
Savage offers 3 different white seamless colors: #50 , #1 , and #66 . The “White” color is the warmest tone of the three while “Pure White” and “Super White” are a completely neutral tone with the difference being the “Pure White” has UV brighteners added to the paper.
Our Setup
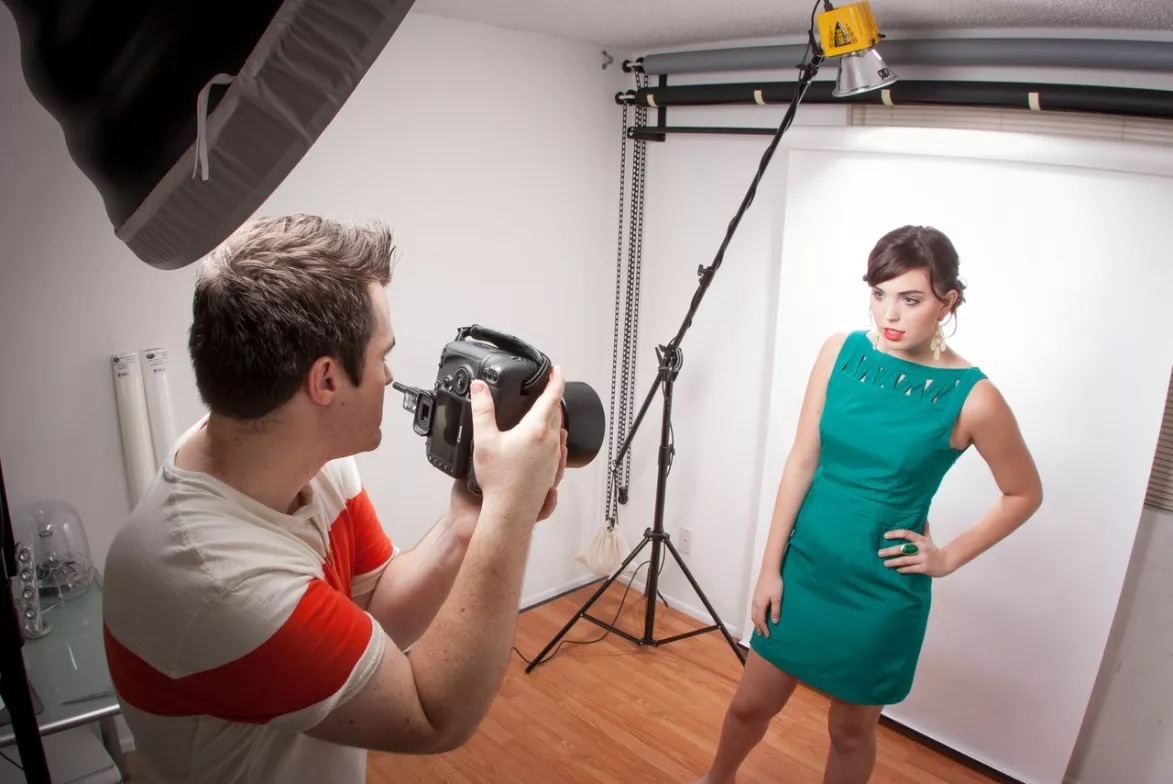
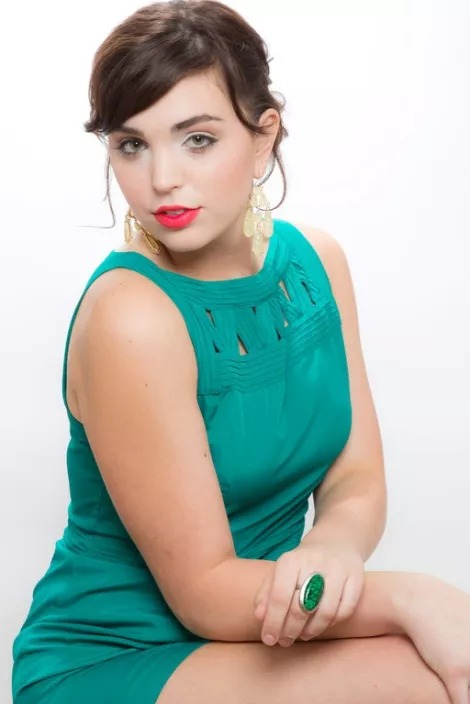
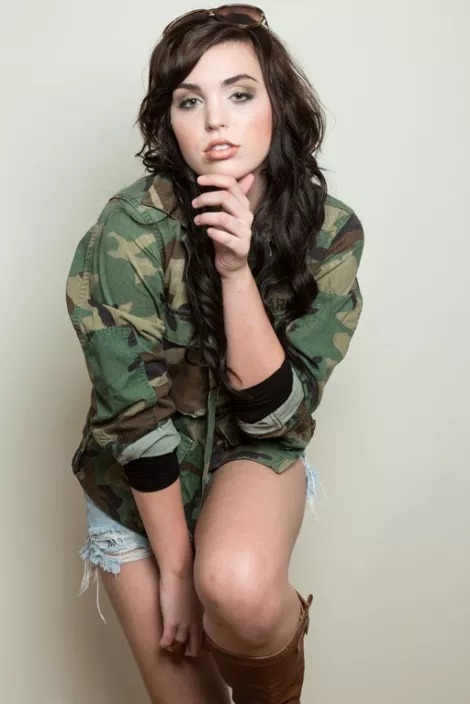
For the sake of an accurate side by side comparison of each seamless color, we shot all of these photos with the same light setup both with and without backlight and the same in-camera settings in daylight color balance. Our space is fairly compact to keep it relatable to what you might be working with in the field. And for the sake of this demo and discussion of light setup when photographing people, we’re working with a model and shooting a product “on-model” catalog style photos.
All seamless paper used is the 53″ width. We also kept it to a 1 light or 2 light setup (key light + backlight) to keep the setup minimal and applicable for those who might not have more than 1-2 lights or the space for them. For the keylight we’re using a 28″ beauty dish with diffuser sock and the backlight is an 80 degree reflector mounted on a boom stand. Depending on your equipment, I would also recommend using a strip soft box or adding a grid screen to the backlight which also functions as a hairlight if you feather the strobe head slightly towards the back of your subject’s head.
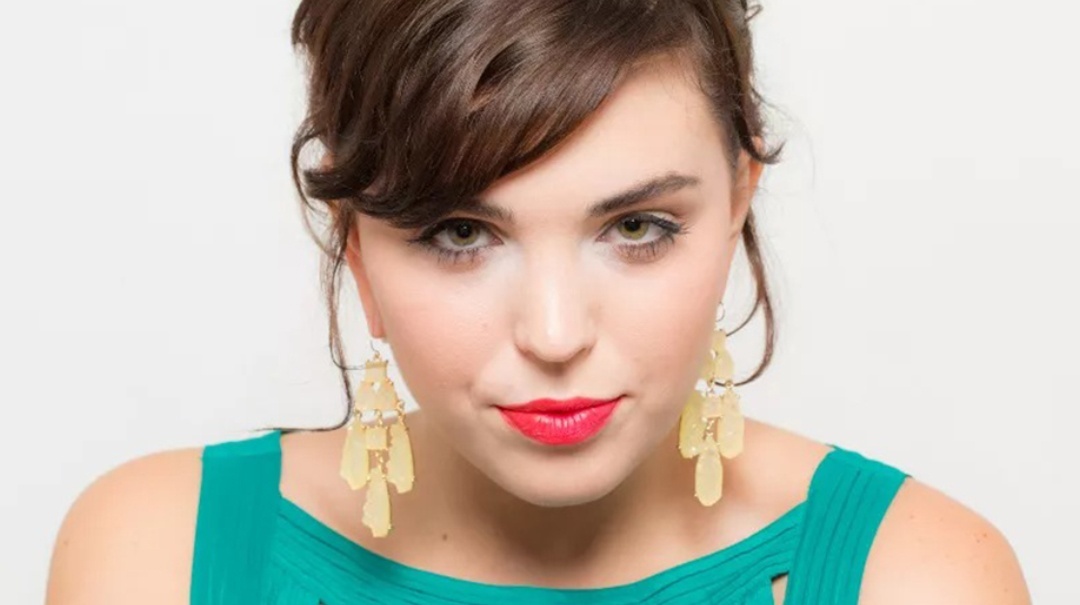
We’ve setup the keylight in a butterfly or paramount style lighting pattern which works well for a single light setup because even without a backlight it positions any drop shadow in a favorable position out of view for most headshots and 3/4 view. Shooting in a tight-space, we have the model about 4 feet from the backdrop with the key light positioned roughly 4 feet from the subject. This gives us quite a bit of light spill from our keylight onto the white backdrop which keeps it a nice bright white without going too gray looking. Adding the backlight into the equation will allow us to blow out the white backdrop on purpose to get an absolute white which is ideal for catalog work and generating composite graphics… saves time in post. Ideally, 2 backlights with more space between model and backdrop would allow us even more separation and blow out for the white – but for sake of this demo we are using 2 lights at the most.
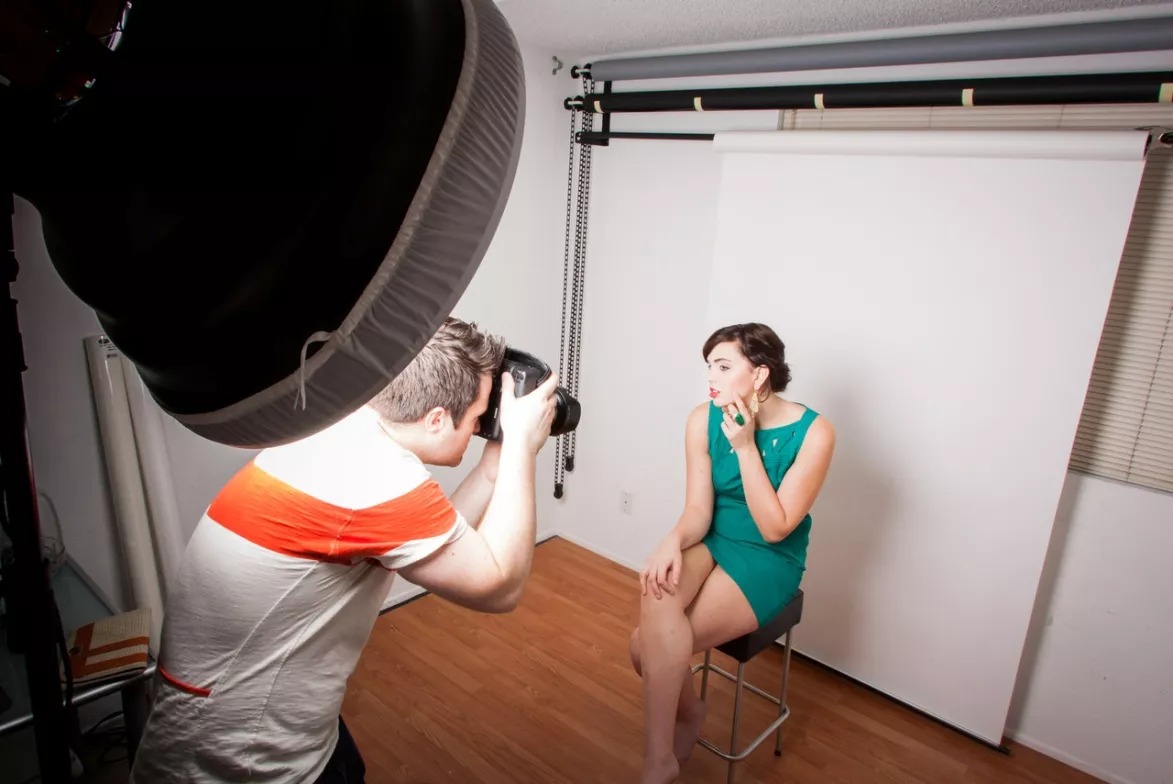
Tip: When shooting with 1 light source without a backlight, choosing the correct modifier and space between model, backdrop and light source is crucial. Larger diffused light sources like an octabox, softbox, shoot through-umbrellas and others help because they create more spill in a wide area which usually means less shadows on the backdrop, but you need to keep the light source pretty close to the model and backdrop or the white will look more gray in the photo. I prefer a 28″ beauty dish because it gives flattering light and it’s direct but still soft.
However, when using just 1 light, regardless of your setup, you will not achieve an absolute white background regardless of which seamless color you use. A backlight is necessary for achieving absolute white without post editing.
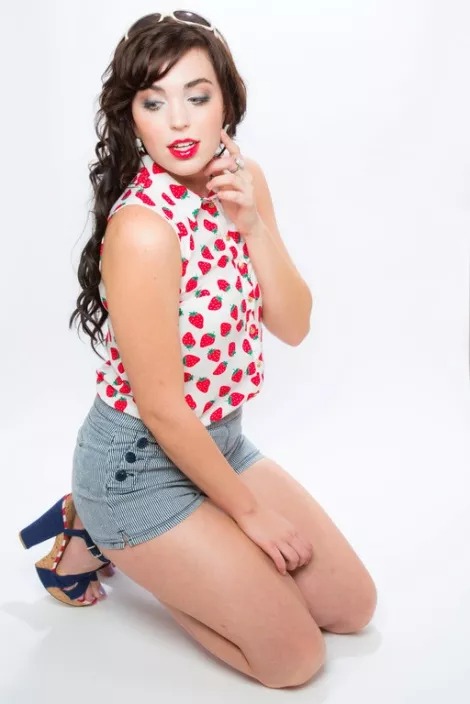
Super White
With Backlight
Without Backlight
Best Uses:
Perfect for product shots & full length subjects
Available in wider sizes, up to 140 inches
Works great to bounce light
Pure White
With Backlight
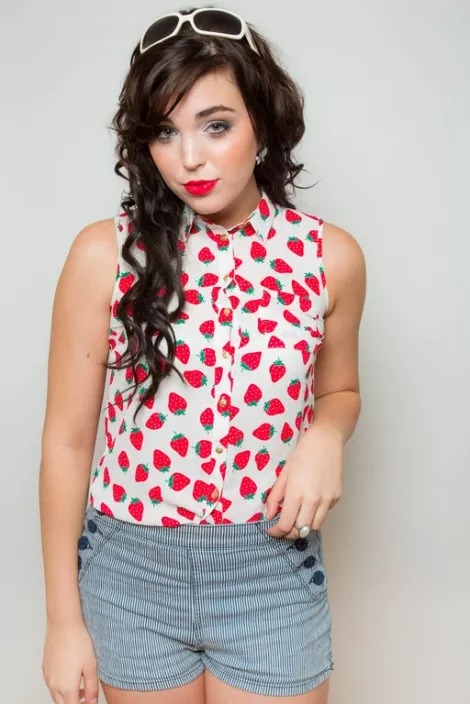
Without Backlight
Best Uses:
Best all-around white, neutral tone
Great for anything from headshots and portraits to product photos
Best for achieving absolute white, using backlights
UV brighteners
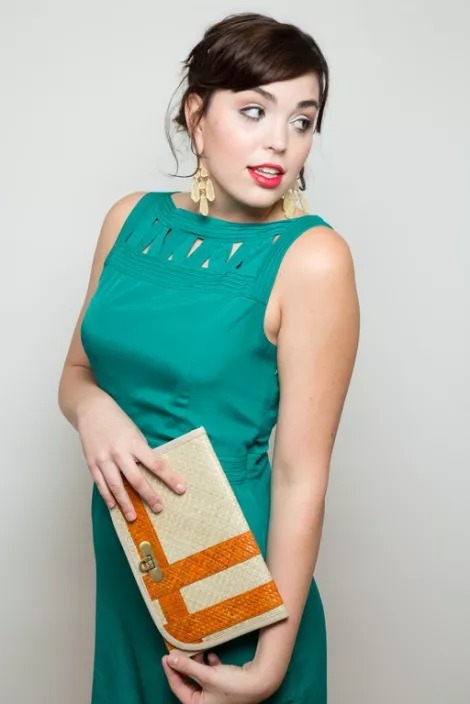
White

With Backlight
Without Backlight
Best Uses:
Great for headshots or portraits where absolute white is not needed
Warm white tone works better with skin tones
More flexibility for “off-white” look
Avoiding Footprints
When shooting full length shots where the subject is standing on the seamless paper, cut a piece of the paper off of the roll to lie over the front area where they will be standing on. Be sure to tape it down so the subject doesn’t slip. The seam will not be noticeable especially if you are using backlights to blow out the white. This helps avoid marks from shoes on the white paper. When that piece gets soiled you can flip it over or cut another small piece. A more permanent solution is to use a large matte finish plexiglass panel. If you can, shoot the full length shots separately from headshots and 3/4 length and wait to pull the backdrop down on the floor until you need it for full length so you don’t waste paper or fight foot prints more than you need to.
*Special thanks to our Model Brielle Bishop, Makeup & Hair by Double Take Artistry, and Styling by Amelia Walsh for their contribution to this project.