
A Color Wheel Portraits Project
October 27, 2021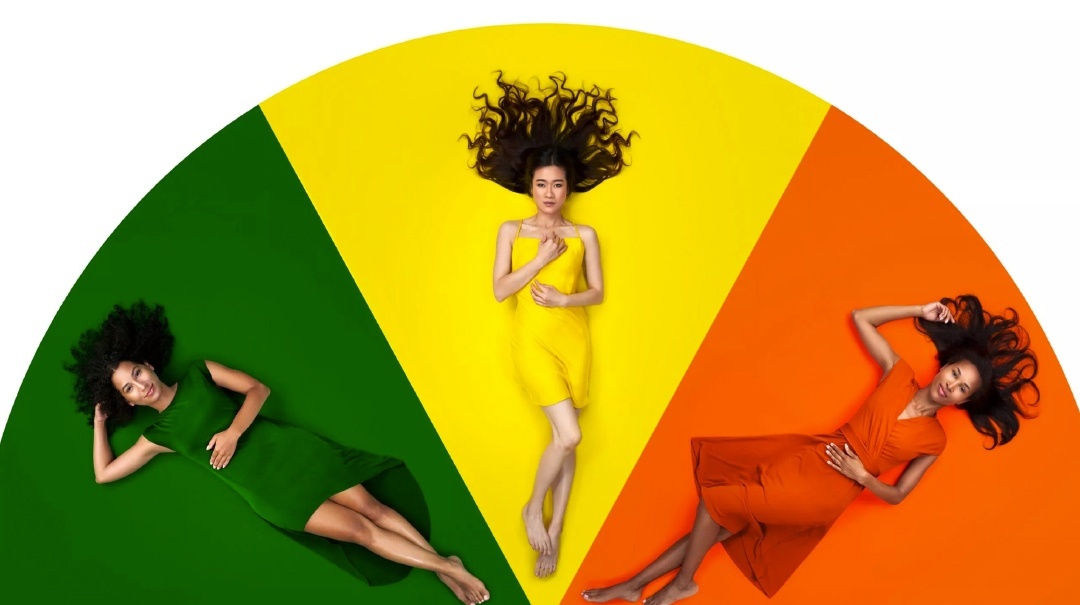
Guest article by commercial portrait photographer, Jon Meadows
My color wheel portrait project is my first art portrait concept that required more than one session. It’s beyond rewarding, and I can’t wait to share it with you!
Coming Up with the Concept
Creative ideas are funny things. The formation of a creative idea sometimes seems instantaneous and sometimes prolonged. My color wheel portraits project seemed to be both. I ‘grew up’ in photography doing headshots. I learned headshots, studied headshots, and built a business on photographing people with a tight crop of their head and shoulders before taking on the challenge of shooting any looser. Eventually, the learning curve slowed down, and the business was going pretty well, and I had the ability to start learning a new genre within portrait photography.
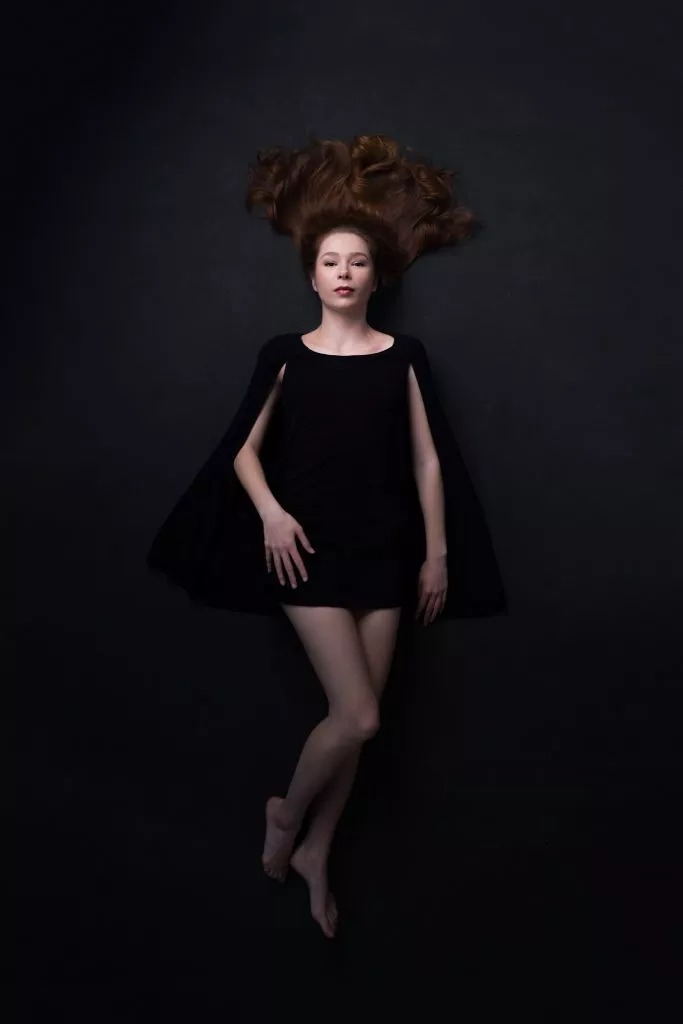
I started collaborating with people I found on Instagram to get shooting experience and start figuring things out. One subject had long hair, so I asked her to lie down so we could spread out her hair and capture her hair, head, and shoulders on the backdrop. It turned out cool. A subsequent model had long hair. I had her lie down, but then I had her get her waist up on the backdrop and shot her waist up. Cooler! I then wanted to do full-body portraits on my hand painted canvas backdrop. I planned the shoot with a very creative person I found on Instagram, and that was the best. It had this quality about it, like people would love it even if they didn’t know Hannah.
That’s when portraits are the highest form of art to me. It was a picture of Hannah, but it wasn’t about Hannah. It was a visual spectacle. And it inspired me to start shooting portraits as art for art buyers, as opposed to only shooting portraits for the subjects and their families.
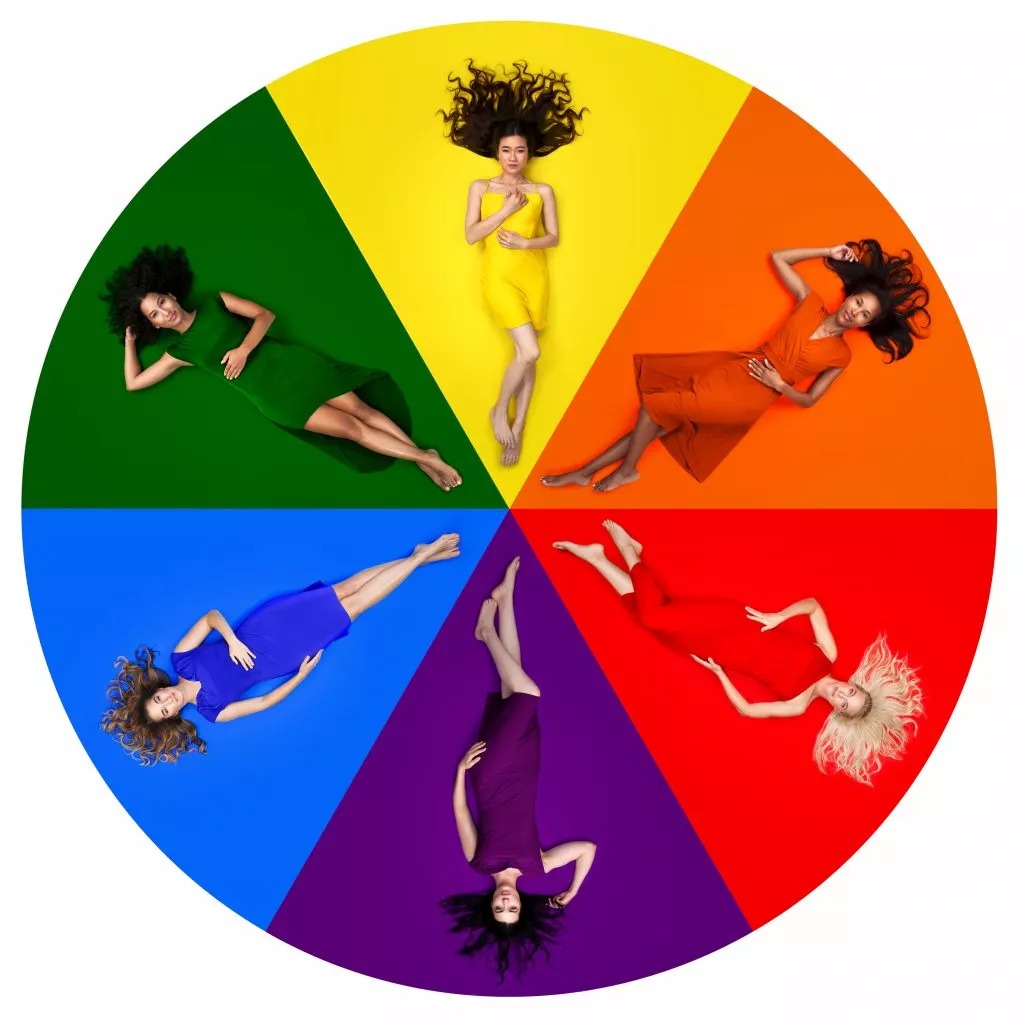
Weeks later, I was diving into color theory, and looking at a color wheel, and BAM! After weeks of developing this idea to shoot someone lying down from above, with their hair spread out, this color wheel portraits project came to me in a flash.
Planning the Concept
I knew I wanted these portraits to be shot consistently with a shared style and facial expressions that went well together. I wanted something like a pleasant but more serious, intense expression. I decided to use Savage’s 53” rolls of , , , , #35 Holly, and . It was important to have a background that was close to the final background color so the light bouncing would be the same color as the background, and it was important for the dresses to be a matching color to the background.
Collaborating on the Concept
I reached out to well over a hundred women in the Washington, D.C. area who had long hair, seemed to have some clothes that could work, and I put an emphasis on finding people that could provide a range of ethnicity and skin color in this project. About twenty got back to me and wanted to participate. I actually photographed about fourteen women in studio over maybe six days over the course of several months (COVID threw a wrench in this, like it did for just about everything).

Shooting the Concept
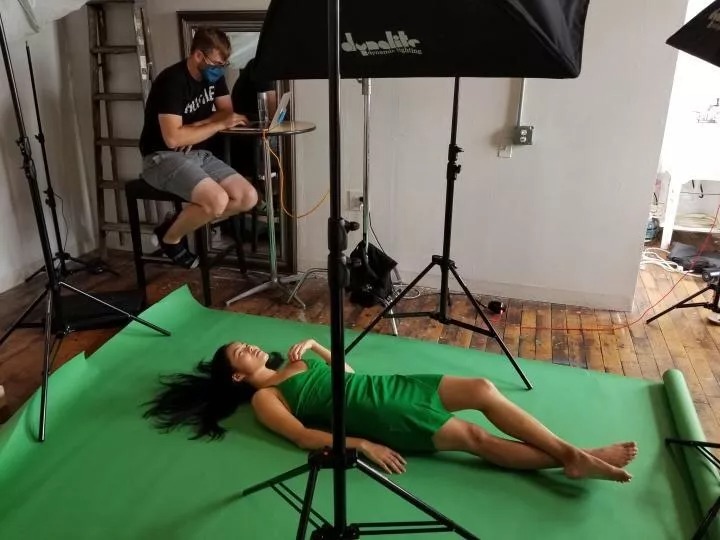
After the shoot that gave me inspiration for my color wheel portraits project, I invested in a camera mount that I could suspend over the subject on a c-stand with an arm. I began tethering with Capture One and my Tether Tools cable to my laptop. This allowed me to shoot without getting up on a chair and holding the camera over the model, and it allowed me to be more precise with getting the camera directly above the model.
Shooting on the Savage backdrops that match the look I was going for helped me envision the final images, before being retouched. To my mind, they didn’t need much done to them, other than evening out the exposure on the background – it’s hard if not impossible to evenly light an 8’x6′ area, while having nice light on a subject. My lighting setup got it pretty close.
I was working with five XPLOR 600s. One was in a 5-foot umbrella, double diffused above the model from the image’s perspective. One was above and to the left of the model, intended to give some directionality to the face light. Two were in 1’x3′ softboxes on the sides of the model, and one was in a 1’x2′ softbox below the model. The ones above, below, and on the sides of the subjects were set for nice, even light.
Finishing the Concept
I chose six portraits that I thought created the best color wheel. I outsourced my retouching for this, and then figured out how to stitch them together. I’m sure there is a better way to do it than the way I did it, but I basically created a wedge shape by making an equilateral triangle in Photoshop, then creating a circle with the same radius, and added the curved part of the circle to the end of the one of the triangle sides. Then I aligned each image in the wedge, duplicated the wedge over to the color wheel assembly PSD, rotated them appropriately, and assembled it. I then outsourced the retouching to clean up the edges, because they weren’t 100% perfect. Voila!